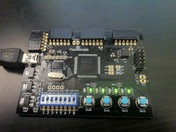
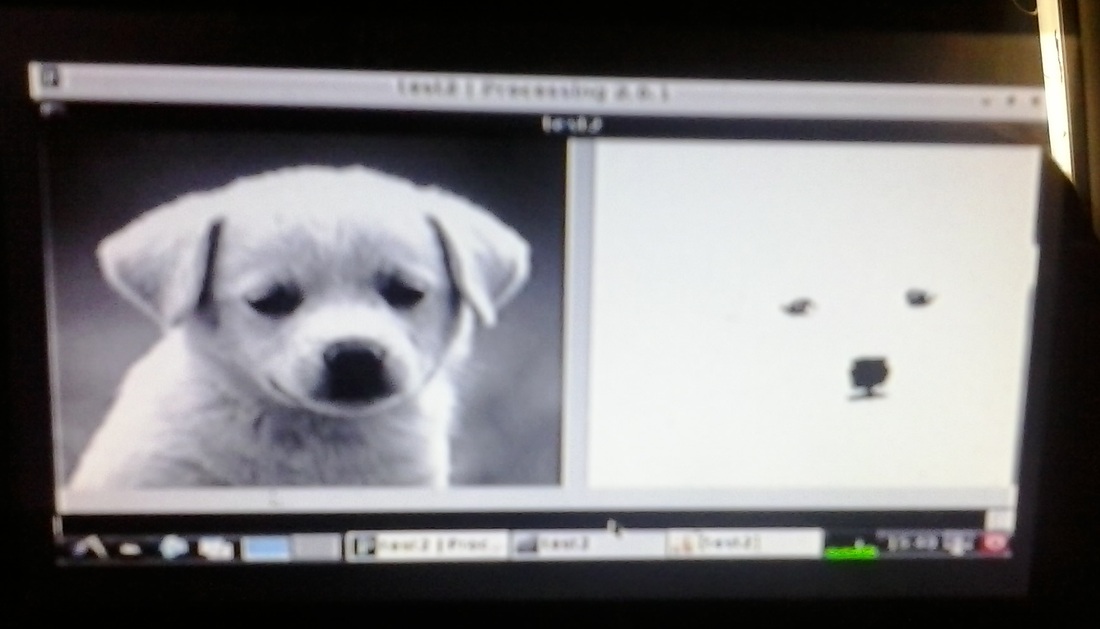
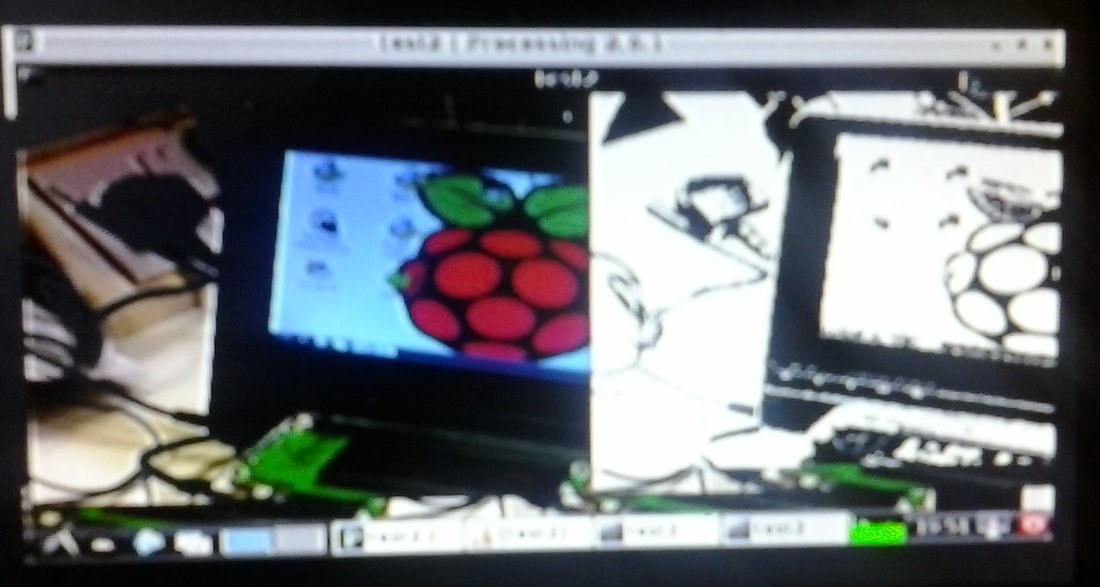
 Detecting the puppy's nose and eyes as blobs. Detecting the puppy's nose and eyes as blobs. Here is my RPI running blob detection algorithm with the help of PROCESSING IDE. The algorithm takes RGB images, converts it into gray scale images and the applies the blob detection algorithm. 'Blobs' are nothing but areas of an image that show rapid change in contract with the background. In layman terms, it can be told as objects that are distinctly visible. Shown in the picture to the left of this post is the image of a puppy, where the nose and eyes are distinct. The algorithm detects them and prints it as another image. This is running on my RPI with Raspbian OS. Two images at the bottom of the post show my RPI setup and the blob detection effect on another image.
"RPI is a small motherboard" I would say for a novice to understand. It is just a computer with restricted computing capabilities. For clear understanding, let us compare our PCs with RPI.
PCs have about 2.5 GHz processor speed, with at least 2 GB RAM nowadays, graphics accelerators and at least 320GB hard disk. It would run Windows or Linux or MAC OS. But RPI has 700 MHz processor speed, with 256MB RAM (in ver A) /512MB RAM (in ver B) and uses SD card as hard disk. Because of the limited hardware features, RPI would not run a heavy OS. Instead, a light weight OS can be run. Let me elaborate the functional changes. You will be able to run heavy software like photoshop, MATLAB, MAYA etc on your PC. But RPI is too weak to handle them. RPI is most suited to run light weight software. So we call it "embedded systems". I have some suggestions about what you can transform a raspberry pi into.
Hope that was a brief 'elaboration'..!!  To setup your RPI for first boot, you will need these...
Download any one of the OSes of your choice from here. (I am a novice. I chose raspbian for no reason) Download WIN32 disk imager or unetbootin Browse the OS image, select the SD card and flash the OS to the SD card. Plug the SD card into the SD card slot found on the bottom side of of RPI motherboard. Power On your TV/display and RPI. You will be taken through raspi config dialogs. Select expand-rootfs and boot to desktop options. The username is "pi" and password is "raspberry". Restart the raspberry pi and enjoy development..!! 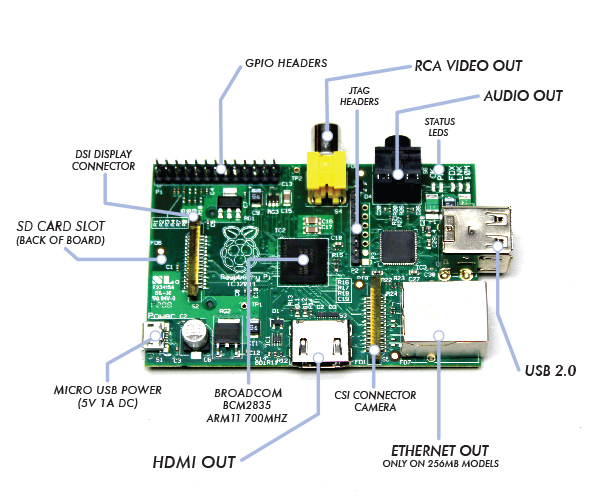 Image Courtesy: www.pcmag.com Image Courtesy: www.pcmag.com I have been meddling with a wide range of micro controllers from 8051 to ARM for years. Now that I wanted to elevate myself to processor based embedded system development, I was on the look out for a low cost platform. Some of them that hit the Google search results were,
Beagleboard Raspberry pi (RPI) Pandaboard Marsboard and Android APC Though cost was more or less the same, I was keen on not spending more for the peripherals. All other boards except RPI demanded HDMI output. Unfortunately I did not have a HDMI monitor or HDMI enabled TV. So there came the RCA video output of RPI seemingly lucrative. I just connected RPI to my TV and got my TV turned as a computer with the wireless keyboard and mouse I had bough for INR 600. Later I pulled out the reverse parking monitor from my Dad's car and started using it on RPI to make it portable. The second reason for choosing RPI is because of the freely available GPIOs on it, which will open doors for interfacing custom peripherals. The third reason is of course the forums and support. So this is my hardware budget. RPI - INR 3000 SD card - INR 490 Keyboard and mouse - INR 600 I use my samsung mobile charger with micro USB port as the supply for my RPI and I additionally use an ethernet cable to provide connectivity to my RPI. |
Raj VigneshPassionate electronics hobbyist. 
Archives
April 2018
Categories
All
|

 RSS Feed
