Putting thread to my previous post on adding a speaker for raspberry pi, I'd like to happily tell that now there is an on board speaker for raspberry pi, that will consume power from the GPIO power pins 5V and GND. A low power audio amplifier IC is used to make this possible. All you have to do as an extra effort is to use an adaptor that could supply at least 1.5A to the raspberry pi. Will post the schematic and photos soon...!!
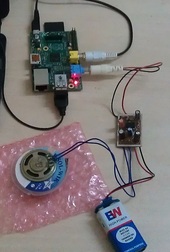 Following the circuit found here, I built an audio amplifier for raspberry pi, that could be connected to the audio out jack of raspberry pi. This is a dirty prototype, which I am working on to make it neat and professional. The setup uses 8 ohms flat speaker and external 9V battery to amplify the sound from the line out of RPI. Work is being done to make it work on the 3.3V pin available amidst the GPIOs of RPI. Now RPI has got a new lease of music life. The video below shows sample videos of mp4 format and audio of mp3 format being played on RPI and heard from the speaker. Currently there is no hardware volume control on the amplifier setup. However, volume can be controlled from the media playing software (VLC). Will look forward for hardware volume control options in the professional edition of the speaker system. Raspberry Pi converts a CRT TV into a computing unit that can do word processing, media playing and browsing. It can also control home appliances to some extent. The video shows CRT TV playing a .mp4 file and creating a word document on the computelevision's desktop..!! 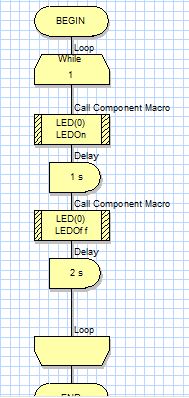 Shown on the left is the flowcode language for the classic "blinky" to be run on PIC micro controllers and AVR micro controllers. The tool is one of the best I have ever personally used to program micro controllers. Trust me, it involves not even a single line of any programming languages like C/C++. It is all about drag and drop. You can find the videos about the tool in youtube. Yet, on request I can guide anybody in drawing benefits from this tool. This is "the" ultimate tool for an absolute beginner and best suited for one that wants to learn micro controller programming and interfaces in a hassle free way. Just give it a try. Ask google and youtube about the tool. If those big teachers cannot make you comfortable with the tool, here I am.
 Demonstratively learnt to assign static IP address in Linux using commands on raspberry pi. The network interfaces file is to be edited for achieving that. The following command will open the network interfaces file.
sudo nano /etc/network/interfaces. Then replace "iface eth0 inet dhcp" with iface eth0 inet static address 192.168.1.10 netmask 255.255.255.0 gateway 192.168.1.1 network 192.168.1.0 broadcast 192.168.1.255 The IP address can be of your choice. use CTRL+X to save and close the file. When asked for confirmation, enter 'Y' and hit ENTER. DO NOT FORGET TO REBOOT THE SYSTEM FOR CHANGES TO TAKE PLACE. After rebooting use the command "ifconfig" to check the IP address of RPI. DHCP is Dynamic Host Configuration Protocol, where the IP address will get assigned dynamically. We are forcibly removing it and inducing an IP address of our choice. It was mid night I struck on the idea of converting my TV into a computer.
Installed the latest RASPBIAN WHEEZY on my RPI. Then used the commands sudo apt-get update and sudo apt-get upgrade, to update the installation. Then used sudo apt-get install libreoffice to install LIBRE OFFICE suite. Finally installed VLC media player using sudo apt-get install vlc . Now its up and running on my TV. Yes I browse, watch movies, perform documentation and accounting on my TV. Television is now computelevision. The day dawns with a happy feeling..!  Thermal image of a hot iron block Thermal image of a hot iron block Infrared temperature sensors like the one listed here, has been interfaced to an analog to digital converting circuitry and in turn connected to Raspberry Pi. A processing sketch that runs on RPI acquires the signals from the infrared sensor and maps it as an image with different intensity of gray shades to indicate with area is hot and which area is cold. the image displayed by the processing sketch shows shades of gray, where black indicates a hot area and white indicates a cold area. Shown on the left is one such output images obtained as a result of scanning a block of iron heated from one end. The output image shows that the bottom part of the iron is hotter than the top part. Thus thermal imaging is possible on RPI..!! Come on, it is such a small task for RPI..!
Happy to have delivered a guest lecture to the UG and PG students of Saveetha Engineering College, Chennai, on Rapid Development of Embedded Systems. 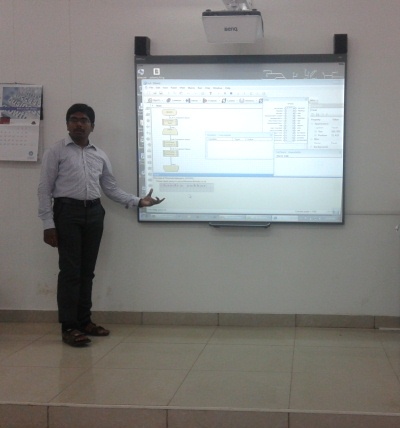 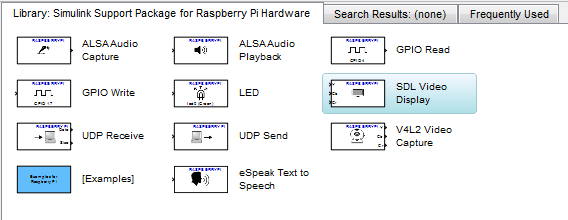 Simulink blocks available for RPi in MATLAB2013a. Simulink blocks available for RPi in MATLAB2013a. Simulink 2013a version has extended target support for RPi model B. ow you can develop applications for raspberry pi on Simulink by using the Simulink blocks for RPi. A new firmware for RPi, compatible with Simulink is Raspbian Wheezy, which can be downloaded by using the "target updater" of simulink. This firmware (OS image) should be flashed to a SD card and then be used to boot the RPi. Then connect RPi to a router or directly to host PC by using ethernet cable. Simulink uses TCP/IP protocol to download simulink models and run the same on RPi. For more information, visit this page. You will have to note down the IP address of RPi by executing the command "ifconfig" on RPi's terminal and use the same as reference to link the host PC and RPi. In case you need more help, please leave a comment or mail me.
 The pi4j library is now integrated with the processing IDE on Raspberry Pi, opening doors for integrated code development for front end software and back end hardware control. Processing IDE is one of the easiest IDEs (I have worked on) for development of applications for windows, linux and android. The pi4j library installation carried out as per the guidelines here and here will integrate the accessibility of the GPIO pins on the RPi with the front end software that would be normally developed with processing on RPi. So what can be done with this integration is, one can write a front end software or app, that will access/command the GPIO pins on the RPi. This will open door for rapid development of GUI based embedded systems like kiosks, POS terminals interactive automation systems.
|
Raj VigneshPassionate electronics hobbyist. 
Archives
April 2018
Categories
All
|
 RSS Feed
